How to install neovim treesitter on Windows 11

How to install neovim treesiteer on windows 11

It was a real hassle to get nvim-treesitter to work on Windows 11. Here is how I got it working. - A working installation guide in 2024.

Dependencies

The neovim treesitter plugin requires a working C/C++ compiler to install new language support. Even though the github documentation explains how to install several C/C++ compilers, only one worked for me: clang compiler installed through the Build Tools for Visual Studio 2022. Installing clang from the LLVM app did not link properly and using the cl compiler from the Build Tools did not work either.

First, download the Build Tools for Visual Studio

In the installation windows, be sure to check Desktop development with C++ on the left and C++ clang tools for Windows on the right as show in the picture below.

Visual Studio build tools installer
Visual Studio Build Tools Installer

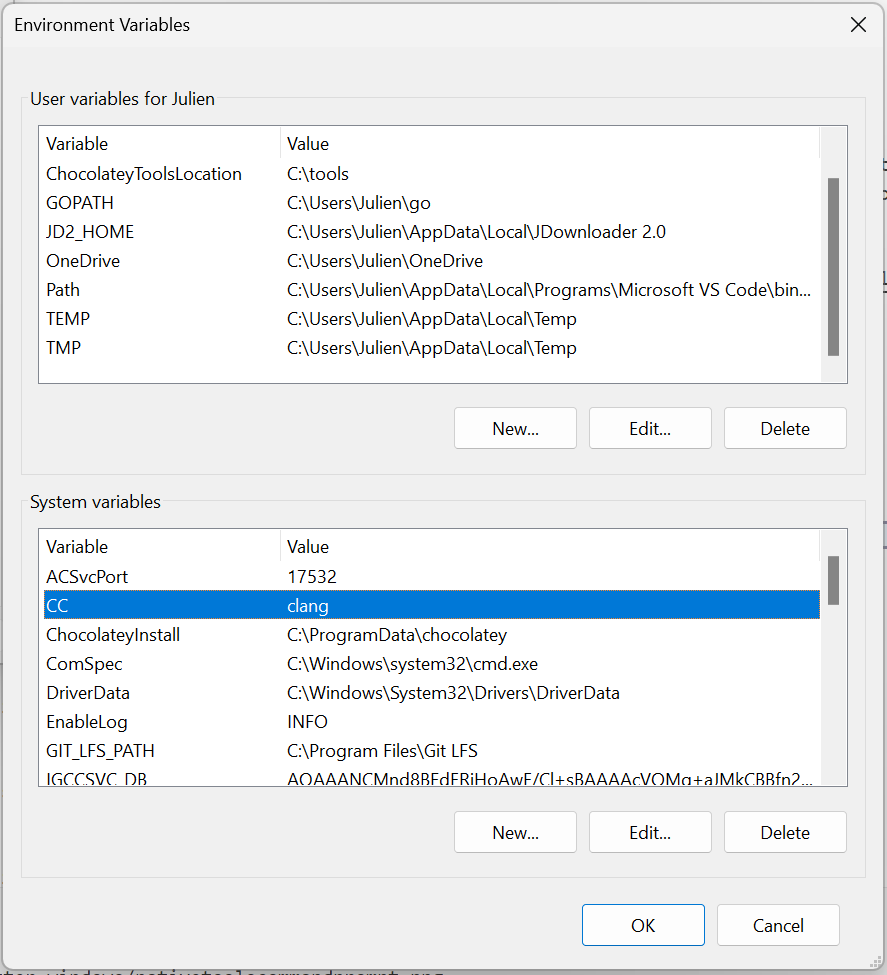
Then, update the system environment variables and set CC = clang.

Setup steps

To avoid parsers conflicts, rename the following folder:

1
C:\Program Files\Neovim\lib\nvim\parser

To something else, for instance:

1
C:\Program Files\Neovim\lib\nvim\parser.sav

Configure the terminal

To be able to compile the treesiter parsers, you need a working developper terminal. Here is how to configure powershell.

First, open or create the powershell user-profile file:

1
notepad.exe $HOME\Documents\PowerShell\Profile.ps1

And paste this code (related stackoverflow thread) inside:

1
2
3
4
5
6
7
8
$vsPath = &"${env:ProgramFiles(x86)}\Microsoft Visual Studio\Installer\vswhere.exe" -latest -products * -requires Microsoft.VisualStudio.Component.VC.Tools.x86.x64 -property installationpath

Write-Host "Microsoft Visual Studio path = '$vsPath'"

# Use module `Microsoft.VisualStudio.DevShell.dll`
Import-Module (Get-ChildItem $vsPath -Recurse -File -Filter Microsoft.VisualStudio.DevShell.dll).FullName

Enter-VsDevShell -VsInstallPath $vsPath -SkipAutomaticLocation -DevCmdArguments '-arch=x64'

Finally, restart your terminal and make sure you are running 64 bit powershell as follows:

1
[Environment]::Is64BitProcess

This should respond true. If it doesn’t look for the 64bit powershell executable on your machine.

Install nvim-treesitter

Finally, install nvim-treesitter using you favorite package manager. The nvim-treesitter github has some installation instructions. Here is my init.lua file:

 1
 2
 3
 4
 5
 6
 7
 8
 9
10
11
12
13
14
15
16
17
18
19
20
21
22
23
24
25
26
27
28
29
30
31
require('pckr').add{
  {'nvim-treesitter/nvim-treesitter',
    tag = "v0.9.2",
    run = function()
        require ('nvim-treesitter.install').compilers = { "clang" }
        local ts_update = require('nvim-treesitter.install').update({ with_sync = true })
        ts_update()
    end,
    config = function ()
      require ('nvim-treesitter.install').compilers = { "clang" } 
      local configs = require("nvim-treesitter.configs")
      configs.setup({
        ensure_installed = { 
            "go", "gomod",
            "python", 
            "c", "lua", "vim", "vimdoc", "query", "markdown", "markdown_inline"},
          sync_install = false,
          highlight = { enable = true },
          indent = { enable = false },  

          -- Enable vim-matchup plugin integration with treesitter
          matchup = {
            enable = true,
            include_match_words = true,
            -- disable = { "c", "ruby" },
            -- [options]
          },
        })
    end,
  };
}

Hopefully, you can get it up and running too. Happy coding!

© 2020-2025 Takia.Dev
Last updated on Sep 06, 2024 01:00 UTC